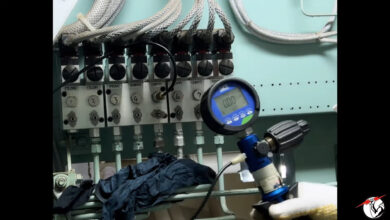
From Grimy to Gleaming: How to Overhaul a MAN B&W Suction Valve
Suction Valve Overhaul for MAN B&W Engines: Because Who Doesn’t Love a Good Valve Spa Day? 🛠️🚢
Welcome, budding engineers, to the fascinating world of fuel pump suction valves—a place where threads are delicate, springs are moody, and cleaning is oddly therapeutic. Today, we’re diving into the overly complicated yet somehow satisfying process of giving your suction valve a full makeover. Let’s get this show on the road before your engine gives you the silent treatment.
Step 1: Dismantling – The Art of Taking Things Apart Without Screwing Them Up
First up, grab the right tool. No, not that rusty wrench you found in the corner—use the proper one. Your mission is to unscrew the suction valve from the fuel pump’s top cover.
Now, here’s the kicker: the threads are fancy. By “fancy,” I mean incredibly easy to damage, so treat them like you’re diffusing a bomb. One wrong twist, and you’re the proud owner of a broken thread and a lot of regret.
Once you’ve successfully removed the valve (congrats, you!), it’s time to move on to…
Step 2: Vice Time – Hold It Together, Literally
Pop the valve into a vice with soft jaws. And yes, soft jaws matter—unless you want the valve to look like it had a bar fight with a wrench. Secure it, but don’t strangle it.
Next, grab a brass or copper rod. Why? Because we’re hitting things. Gently. Tap the valve from the top to release the spring and valve body. Fun fact: if you hit it too hard, you’re not fixing a valve; you’re auditioning for a demolition derby. 🚧
Safety Tip: This thing is heavy. If it falls, it’s not the valve that’s going to feel it—it’s your foot. So keep those toes clear, folks. 👟❌
Step 3: Cleaning – The Valve’s Detox Program
Now that the valve is free, it’s time for the deep clean. Your tools? Diesel, a clean rag, and air pressure. Your goal? A valve so spotless it could moonlight as a mirror.
What to Do:
- Diesel it up: Splash some diesel to break up the grime. Bonus: the smell will stick with you for hours.
- Wipe it down: Use a clean rag to evict the dirt and carbon buildup like a landlord with a vendetta.
- Blow air everywhere: Get rid of any sneaky dirt hiding in the corners. Don’t stop until it’s cleaner than your conscience.
Critical Zone Alert: The seating area is your main focus. If it’s scratched, dented, or just looking tired, grab your lapping tool and give it the glow-up it deserves. 🌟
Step 4: Inspection – Channel Your Inner Sherlock 🕵️♂️
Time for the close-up! Look for damage, dirt, or anything that screams, “I’ll cause a breakdown later.” Pay extra attention to:
- Seating surfaces: No marks or damage allowed.
- Threads and passages: Clean and smooth is the name of the game.
- Valve fit: The valve should slide in like butter. If it sticks, don’t force it; fix it.
Step 5: Reassembly – Bring It All Together (With Lube)
Finally, the moment you’ve been waiting for: putting this bad boy back together. Apply some lubricant to ensure everything goes in smoothly.
The Order of Business:
- Fit the valve back into its liner. If it doesn’t go in easily, stop and figure out why—it’s not playing hard to get for fun.
- Reinstall the spring and holder seat.
- Use a brass or copper hammer to gently tap everything into place. Key word: gently. Smash it, and you’re back to square one.
Step 6: Seal the Deal – Literally
Replace the seal ring. This step isn’t optional unless you enjoy the smell of leaking fuel. Use the special tool for mounting the seal ring (yes, it’s worth digging it out of the tool kit), and press everything firmly into place.
Pro Tip: Don’t skimp on the inspection after reassembly. A quick once-over can save you hours of redoing it later. Look for dirt, misalignment, or anything that seems off.
Conclusion: You Did It (Probably)! 🎉
And there you have it: your suction valve is now clean, functional, and ready to suck (in a good way). If you managed to do all this without breaking a thread, smashing your toe, or dropping a spring into oblivion, give yourself a pat on the back. If not, well… better luck next time.
Got questions? Leave them in the comments—or ask a senior engineer, because I’m just here for the sarcasm. Happy wrenching! 🔧


